
Workflows are built in the Workflows tab of application settings, by an administrator.
Create a workflow #
Before you start, write down the stages of your process and the moves between them. Building the workflow is quick; deciding what it should be is the real work.
To create a workflow:
- Open the relevant application.
- Select Application settings.
- Open Workflows.
- Select Create Workflow.
- Enter the Workflow Name and a Description.
- Select Create.
- Add the states the process needs.
- Add the transitions between them.
- Select Create at the bottom of the builder.
Auclio starts a new workflow with a single state named Draft, marked as the start state. Rename it or replace it as you prefer.
The workflow opens on a canvas, where states appear as boxes and transitions as arrows between them. Auto layout arranges the diagram tidily, and Fit view brings the whole workflow back into sight.
Note the two separate steps. Selecting Create in the first dialog only opens the builder — the workflow is not stored until you select Create at the bottom of the builder itself. Leaving the builder before that offers you Save Draft or Discard Changes, and the next time you open Workflows Auclio offers Restore Data or Start Fresh. A draft is not a stored workflow: it is held in the browser you left it in, and nobody else can see it.
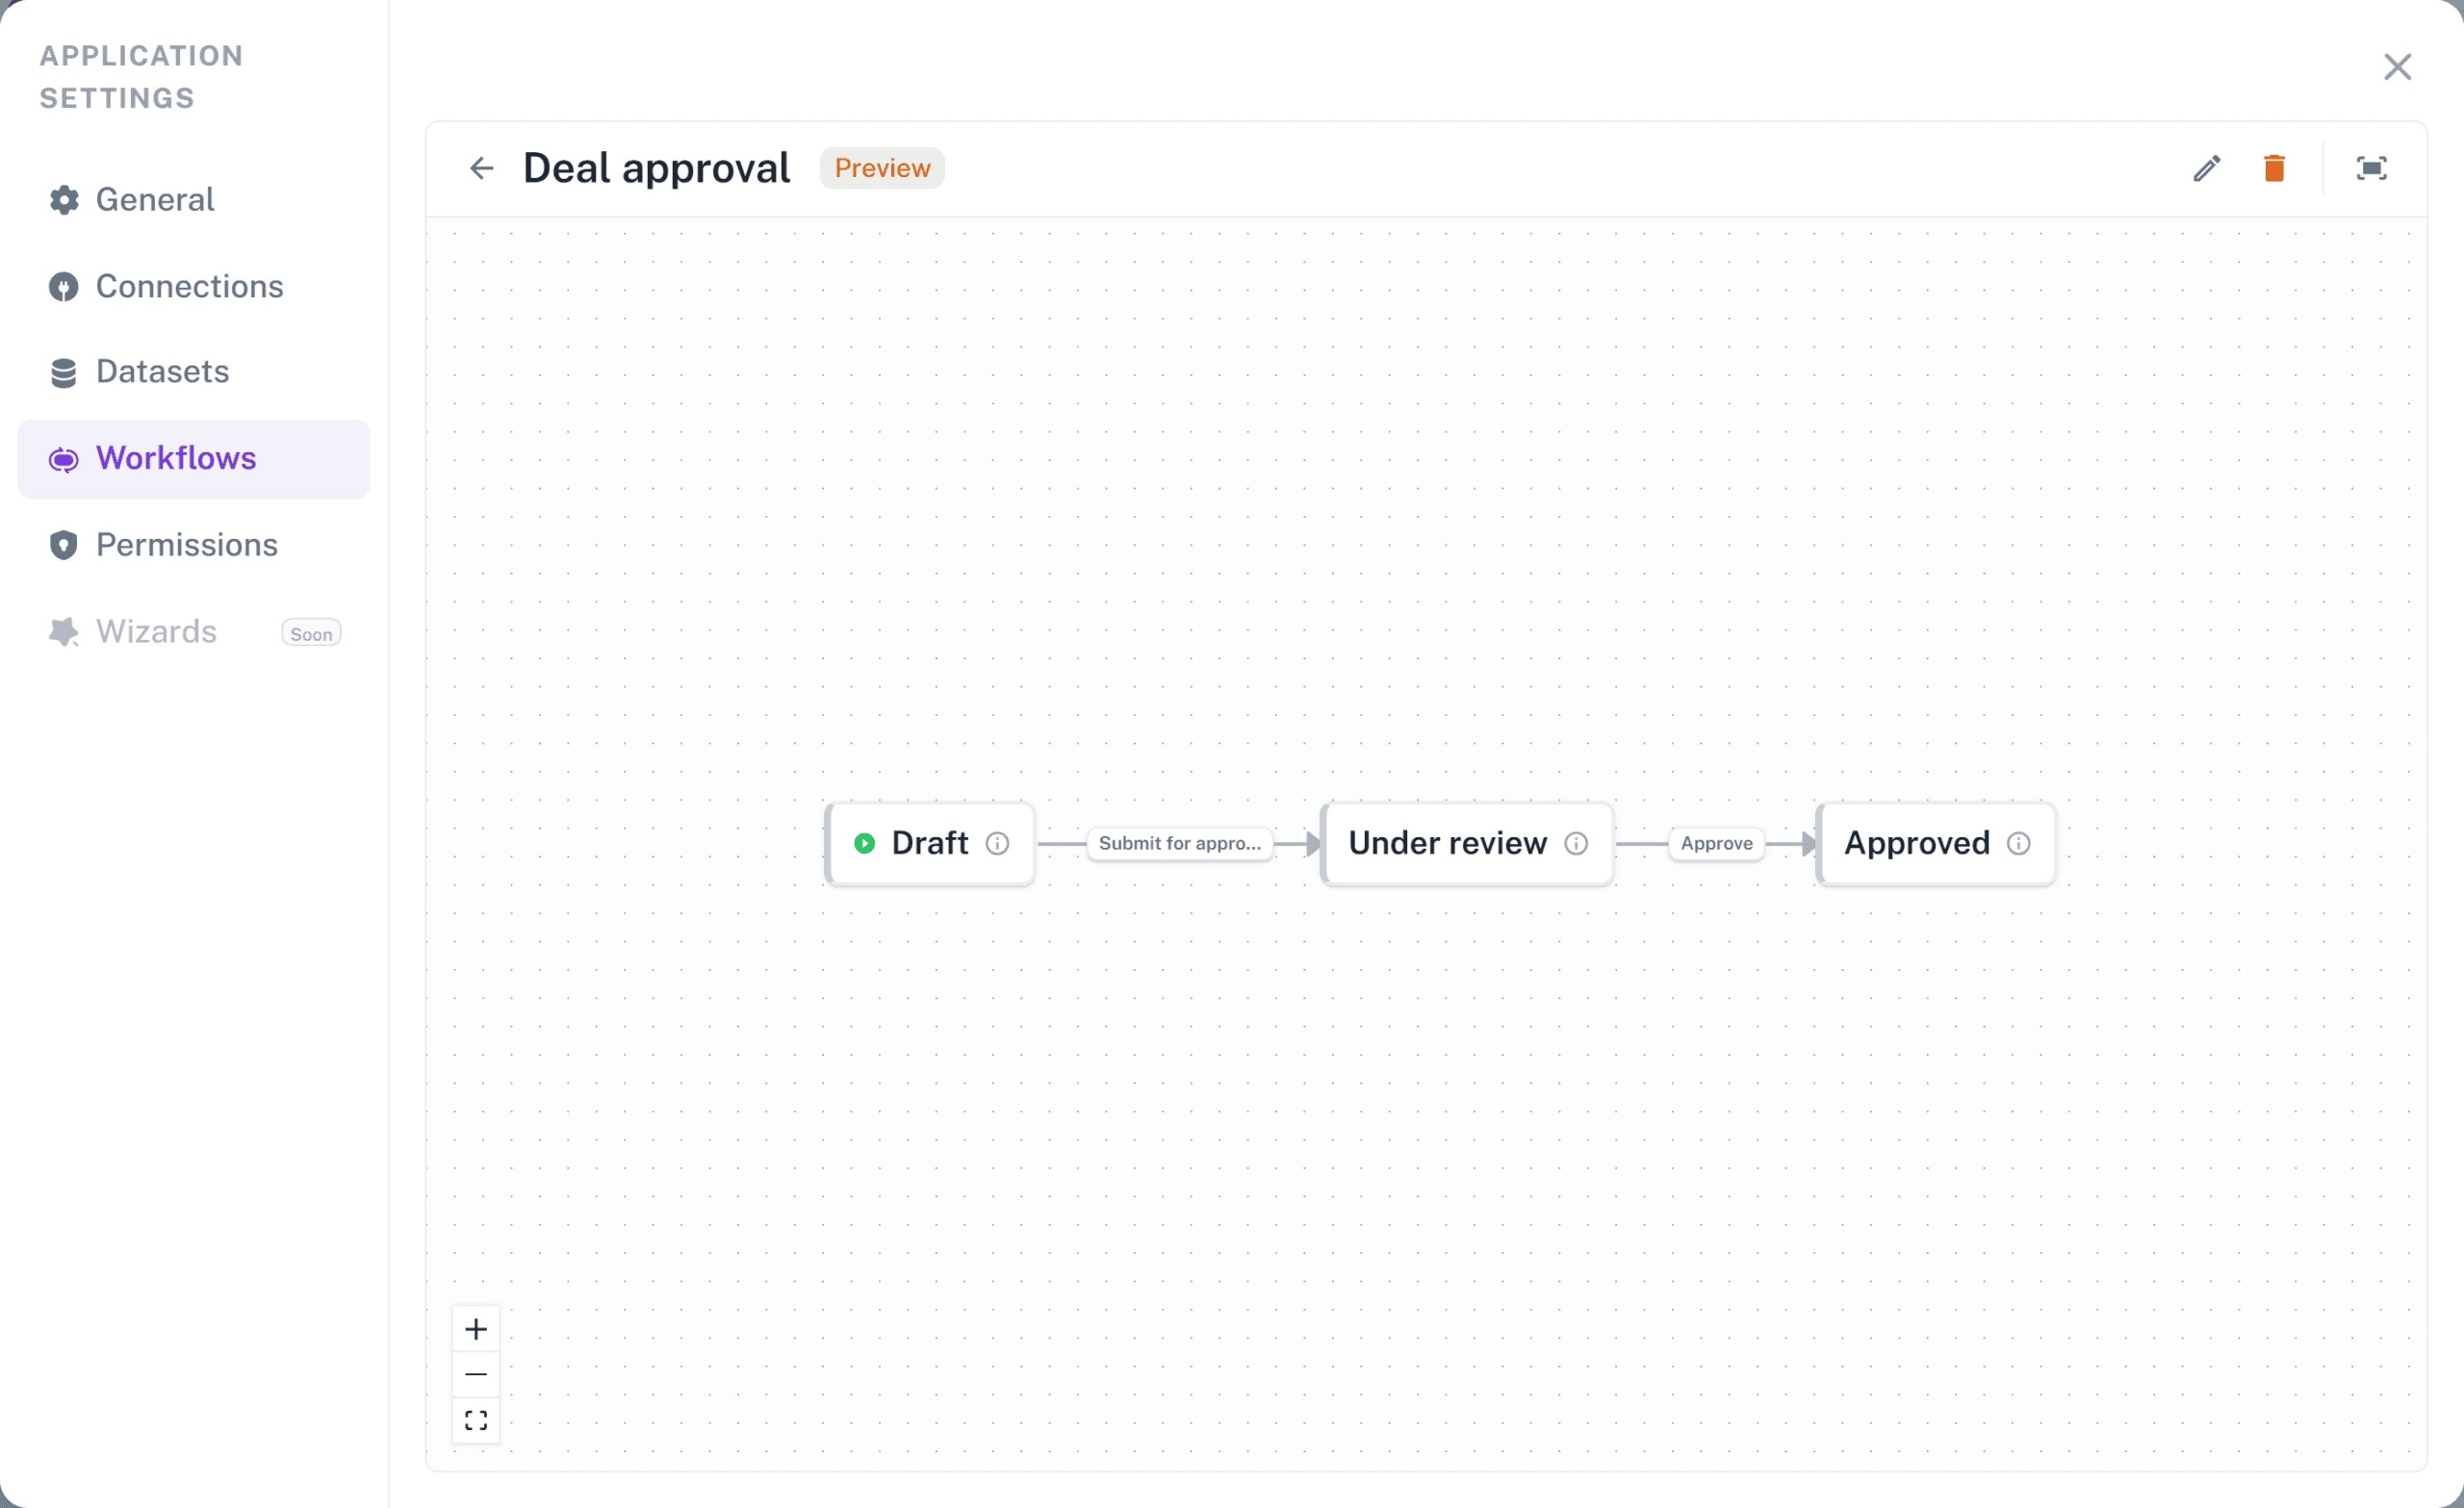
Add workflow states #
To add a state:
- Open the workflow for editing.
- Select New State.
- Enter the State Name.
- Add a Description explaining what the state means.
- Switch on Start State if new objects should begin here.
- Choose a State Color and a State Icon.
- Select Add.
- Save the workflow when you have finished.
Exactly one state should be marked as the start state. If none is marked, Auclio uses the first state in the workflow.
Give each state a colour that matches its meaning, because the colour is what users actually read in a table. State Color offers ten preset swatches and a no-colour option; you cannot enter a colour of your own. A common scheme is no colour for draft, a warm swatch for waiting states, and a cool one for completed ones.
Drag states around the canvas to arrange them. The positions are saved with the workflow, so the diagram stays readable for whoever maintains it next.
Configure transitions #
There are two ways to start a transition. Either select New Transition and choose the states yourself, or draw the transition directly on the canvas by dragging from the edge of the source state onto the target state. Dragging opens the same dialog with From State and To State already filled in, which is usually quicker once the states are laid out.
To add a transition:
- Open the workflow for editing.
- Select New Transition, or drag from the source state to the target state on the canvas.
- Enter the Transition Name, describing the action a user is taking.
- Add a Description.
- Check the From State and the To State, and set them if you used the button.
- Choose whether the transition is manual or automatic.
- Select Add.
- Save the workflow when you have finished.
Both states must exist before you can connect them, so add every state first and then draw the transitions between them.
Name transitions as actions, not as destinations. Submit for approval tells a user what they are doing; Approved does not.
Manual transitions #
Leave the trigger set to No automatic transition. The transition then appears to users as an available next state, wherever the object’s state is editable.
Automatic transitions after a number of days #
Choose Trigger the state transition after a number of days and enter the number in Days. Auclio counts from the moment the object entered the source state. Zero means the transition fires immediately.
Use this for time-based process rules: escalate a request that has been waiting five days, or archive a closed item after ninety.
Automatic transitions on criteria #
Choose Trigger the state transition once the object fulfills the specified criteria and build the conditions. All conditions must be met for the transition to fire.
Each condition names a Property, an Operator, and a Value. For Date, Time, and DateTime properties, an Options setting changes how the comparison is made:
- None — compare the raw value;
- Date() — compare the calendar date only, ignoring the time of day;
- DaysFrom() — whole days from the property’s date until now;
- DaysTo() — whole days from now until the property’s date;
- Month() — the month number, 1 to 12;
- Year() — the year;
- YearAndMonth() — year and month combined.
Criteria can only be built once the workflow is attached to a dataset, because the conditions refer to that dataset’s properties. Until then the option is offered but cannot be chosen. Attach the workflow first, then return to add criteria. The properties offered are those of every dataset using the workflow.
Where several automatic transitions could fire from the same state, set the Evaluation priority on each so that Auclio considers them in a defined order. It accepts 0 to 100, and the lowest number is considered first. Only one transition fires in a single pass.
Auclio does not let you save a criteria-based transition with no conditions, and every condition must name a property. Should a transition ever end up with an empty criteria set, it never fires.
Assign a workflow to a dataset #
A workflow does nothing until a dataset uses it.
To assign a workflow:
- Open Application settings.
- Open Datasets.
- Open the dataset for editing.
- Select the workflow in Default workflow.
- Select Save Changes.
Every object in the dataset then follows that workflow, and new objects start in its start state unless whoever creates them picks a different one.
Default workflow lists the workflows belonging to the dataset’s own connection. A dataset stored in Auclio is therefore offered the workflows you built in Auclio, and an M-Files dataset is offered the workflows synchronized from its vault. The picker enforces this, not the server, which only requires the workflow and the dataset to belong to the same application.
A workflow can be created from the dataset dialog itself. Select Create new workflow in the Default workflow list. This opens the same two-stage builder, and the workflow is created on the application’s internal connection. There is no draft prompt on this route, so closing the dialog before you select Create discards the work.
Display workflow states #
Assigning a workflow adds two properties to the dataset: Workflow and State.
To show the state in a table:
- Open the page and enable Layout edit mode.
- Edit the Table widget.
- Move to the Columns step.
- Add a column and select the State property as its dataset field.
- Enter a Column Label such as
Status. - Select Update and save the page layout.
The column shows each object’s current state, coloured as you defined it.
To show the state on a details page, add an item to the Text Grid widget pointing at the State property in the same way.
The State property can also be used in the table’s filters and grouping, so a page can show only the objects in a particular state, or group the list by state.
Change an object’s state #
Users change a state by selecting a new value in the State column or item, where editing is enabled.
The options offered are the states reachable from the object’s current state through a manual transition, labelled by the state each transition leads to. A user in Draft with only a Submit transition sees one option. Where the current state has no outgoing manual transition, the dropdown shows the current state and is disabled. On a row still being created there is no current state yet, so every state in the workflow is offered instead.
Changing the state requires permission to modify the object. There are no separate permissions on individual states or transitions, so anyone who can edit an object can perform any manual transition available from its current state. Where a particular move must be restricted to certain people, restrict who can modify the object at that stage.
Automatic transitions happen without anyone acting. Users see the state change on their next refresh of the page. A criteria-based transition, and a time-based one set to zero days, are evaluated as soon as the object is created or changed. A time-based transition with a longer wait is picked up by a periodic sweep, so it can lag its due moment by a few minutes.
Edit a workflow #
To edit a workflow:
- Open Application settings.
- Open Workflows.
- Open the workflow.
- Select Edit workflow.
- Make the changes.
- Select Update at the bottom of the builder.
Use Edit title & description, the pencil beside the workflow’s name in the builder toolbar, to change the name and the description without touching the states or transitions.
Changing a workflow affects objects that are already using it. Removing a state leaves objects that were in it without a valid state, and also removes every transition into or out of that state. Removing a transition may leave objects unable to move forward. Before removing anything, check whether objects are currently sitting in that state.
Adding states and transitions is safe. Removing them is not.
Workflows synchronized from M-Files cannot be edited. Opening one shows it in preview, and selecting edit opens the colour editor, where the state colours are the only thing you can change.
Delete a workflow #
To delete a workflow:
- Open Application settings.
- Open Workflows.
- Open the workflow.
- Select Delete workflow.
- Confirm the deletion.
Remove the workflow from every dataset that uses it first. Deleting a workflow that datasets still refer to leaves those objects without a valid state.
Test a workflow #
To test a workflow:
- Assign it to a dataset with test objects.
- Add the State column to a Table widget.
- Create an object and confirm it appears in the start state.
- Change the state and confirm only the intended options are offered.
- Walk one object through the whole process, from start to finish.
- Try a move that should not be possible, and confirm it is not offered.
- For a time-based transition, set Days to zero and confirm it fires as soon as an object enters the source state.
- For a criteria-based transition, set the values that should trigger it and confirm it fires.
- Repeat the walkthrough with a non-administrator account.
Test the paths people will actually take, including the unhappy ones. A workflow that handles approval well but has no way to reject anything will be discovered at the worst moment.
Troubleshoot workflow issues #
If the State column is empty, check that the dataset has a Default workflow assigned, and that the objects were created after it was assigned.
If no state options are offered to a user, check that:
- a transition exists from the object’s current state;
- that transition is manual rather than automatic;
- the user has permission to modify the object;
- the column or item is configured as editable.
If an automatic transition does not fire, check that:
- the transition has a trigger set, and not No automatic transition;
- the workflow is not synchronized from M-Files, because Auclio never fires transitions on a synchronized workflow — M-Files does;
- the object’s values satisfy every condition, since all of them must be met;
- enough days have passed since the object entered the source state;
- no other automatic transition from that state has a lower Evaluation priority number, because that one is considered first.
If you cannot build criteria, the workflow is not yet attached to a dataset. Attach it and return.
If a workflow cannot be edited, it is synchronized from M-Files. Make the change in M-Files Admin, and it will arrive at the next synchronization.
See Understanding workflows for the concepts behind these settings.
